 FTPeach
Connect to a server
A connection gives one pane access to files on a server. Before filling in the form, get the protocol, address, account details and destination folder from your provider. A website address alone may not be the file transfer address.
On this page
Choose the connection type
| Protocol | What it means for your connection |
|---|---|
| FTP | An unencrypted connection. FTPeach shows a warning; ask your provider whether an encrypted option is available. |
| FTPS | FTP protected by TLS. The server's certificate is checked. |
| SFTP | File transfer over SSH. Check the server's host key; your account may use a password or an SSH key. |
| WebDAV | File access through an HTTP or HTTPS URL. Use the full URL supplied by the provider, including its path. Prefer HTTPS. |
SFTP and FTPS are different protocols, even if both are described as "secure FTP" by a provider. Do not switch between them just to make an error disappear. The protocol reference lists compatibility details.
For step-by-step setup, see FTP, FTPS, SFTP or WebDAV.
Enter your connection details
- Click the source button at the top of a pane and choose Server, then choose the protocol your server supports.
- Enter its Address and Port, then your Username and Password. Use the port supplied by the provider if it differs from the suggested one.
- Select Connect. Once the initial folder listing loads, browse to the folder you want to work in.

For WebDAV, use an absolute URL such as https://files.example.com/dav/,
not just a hostname.
For SFTP with a key, select Log in with SSH key, choose the Key file and enter its Passphrase if required. This uses the key instead of the account password. Keep the private key private; the server administrator normally needs your public key, not the private file.
See SFTP connections for password and key setup, server fingerprints and help with SSH errors.
Save a connection you will use again
A bookmark saves you from entering the same details every time. Open Bookmarks > Manage Bookmarks, choose New Bookmark, give it a recognizable Name, fill in the connection details and choose Save. Use the bookmark's edit button when its address or account details change.
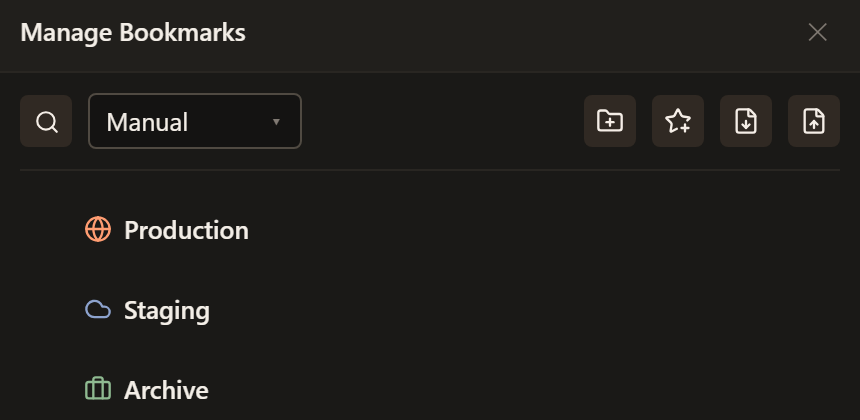
The bookmark manager keeps your saved connections together. The star with a plus opens New Bookmark; hover over a row to find its edit action.
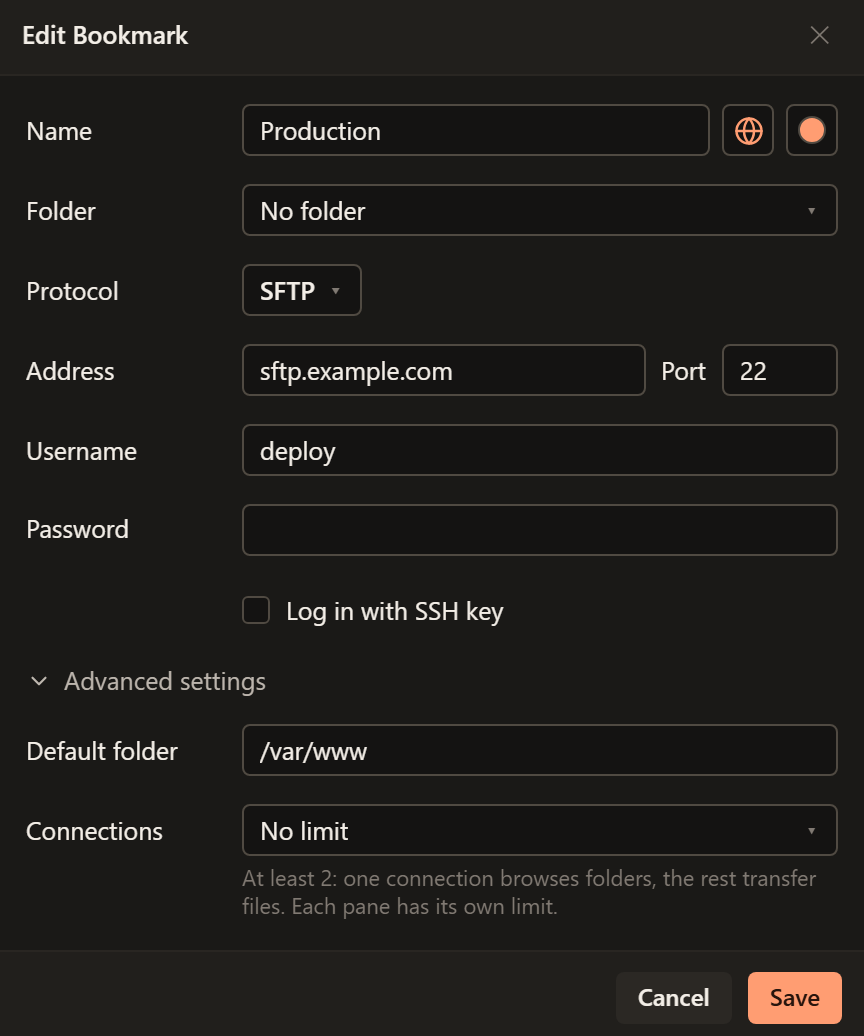
An existing bookmark's editor.
Click a bookmark row, or focus it and press Enter, to connect. Search can find bookmarks by name, host, user or folder. Use names that distinguish production and test servers before you start copying files.
See Protect passwords and move settings before moving saved connections to another computer. If connecting fails, start with the connection checklist.
Connecting safely
By default, FTPeach does not connect to an SSH server it has not seen before until you confirm the server's key. A key that has changed since your last connection is refused.
Once you trust the key, FTPeach connects again with the bookmark's saved password.
With an http:// WebDAV address, your password is not sent over plain HTTP
unless you allow unencrypted sign-in for that connection.